A superb ventilation system in the kitchen is a demand in almost any dwelling. Without it’s a security risk. It is critical to maintaining the atmosphere clean in your house and shield it from cooking, from fumes and grease, by installing the correct exhaust fan.

Kitchens tend to be a location where families bond and prepare nutritious food because of their family members. That is the reason why it is necessary to keep up security and its cleanliness there. Consistently follow security measures to avoid dangers and hazards. Be sure that the gear in the kitchen is in a condition that is very good, that there’s a ventilation system that is good, and there aren’t any fire hazards.
Below are some helpful suggestions to obtaining a ventilation system that is good in the kitchen:
Choose the exhaust fan that is right for your own kitchen. Exhaust fans are essential to dispel fumes, heat, and grease that result. In choosing the exhaust fan that is right for the kitchen, ascertain first the arrangement and size of your kitchen. Subsequently, buy an exhaust fan which is not small enough to prevent overheating and also to ventilate the kitchen. Never purchase an exhaust fan that is smaller, it’ll simply not be useful.
There are various kinds of exhaust fan accessible available on the market but choose a fan that’s not more difficult to wash and keep. It’s critical to frequently assess and clean the exhaust fan because grease and grime collect on it, leading to a blocked inlet. There is a tremendous danger of overheating which in turn leads to fire, in the event the fan is not clean. Ensure that you assess and clean the fan consistently to stop the spread of the accumulation of carbon monoxide that is extremely dangerous to our well-being as well as microorganisms.
Likewise, think about the decor of the kitchen. There are various layouts accessible the marketplace, so select an exhaust fan that fits your own decor and in the setup of your ventilation system.
 One significant idea that’s also essential to think about is the setup and place of the ventilation system of the kitchen. You’ll find just two common kinds of setup, downdraft ventilation or specifically hood ventilation. Select a setup that goes with all the construction of your kitchen. For greatest effectiveness, install over the stove with of course a chimney or outside duct which could expel the air and heat impurities to some secure location.
Consulting an expert continues to be the best in the event that you believe you do not have enough knowledge of the ventilation system of your kitchen. It is the best solution to be guaranteed that you simply have selected the best system for your own kitchen and which you’re free from safety and health dangers.


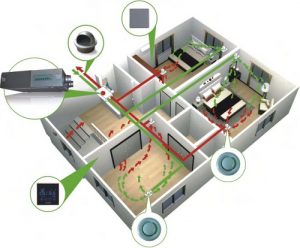
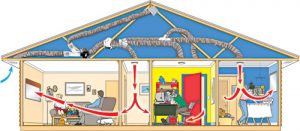
 A heat recovery ventilator also called a heat exchanger is an essential part of an energy efficient building. Enhanced insulation and other measures that produce a building air-tight help keep down electricity bills and reduce energy consumption. Regrettably, additionally, they prevent the induction of clean air, something that buildings require to preserve indoor air quality. Heat recovery ventilators (HRVs) ensure an adequate flow of clean air without endangering the HVAC system’s efficient functioning. HRVs can recover a sizeable part of the energy before exhausting the rancid atmosphere exterior already used the atmosphere, and use that energy to check the clean atmosphere.
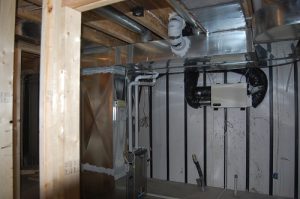 If your house was built within the last twenty years, or if you might have made advancements intended to reduce air reduction (energy efficient windows or updated weatherproofing for example), the odds are great that entire home ventilation, heat recovery or energy recovery system will be exceptionally valuable. Similarly, if you’ve discovered an undesirable quality of indoor atmosphere. Dry eyes or mouth, frequent respiratory infections or breathing difficulties may evidence this. In case you are contemplating a brand new HVAC system, specialists also suggest adding energy retrieval system and a ventilation as a part of the new gear. Both HRVs and ERVs will reduce energy prices, particularly in climates during summer or winter months.
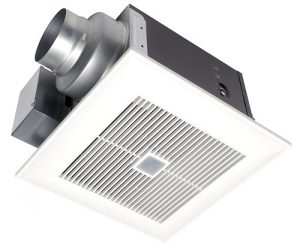 Even if an HRV or ERV process isn’t ideal for your house, think about adding an exhaust ventilation process, supply ventilation process or a balanced ventilation process. A building’s ventilation process is among the culprits in regards to harboring mold. Mechanical ventilation systems are among the more prevalent systems utilized in buildings today. Appropriate ventilation process is a fundamental necessity for all of the houses. A suitable ventilation system for a roof is frequently the sole most essential component which governs its longevity.
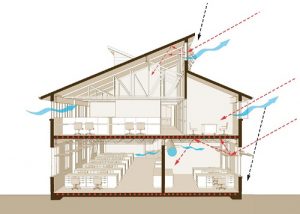 All sorts of ventilation system can fail, and in a number of cases it’s urgent to handle these issues to be able to have equipment ready to go quickly. A house ventilation system delivers multiple advantages. Residence systems for ventilation will guarantee that your dwelling is not only more pleasant to reside in, it’s likewise safer. Residence ventilation techniques have a tendency to decrease both these problems, which makes it comfortable to relish fresh air within your own house. An excellent home ventilation system provides comfort in your home the full year round.
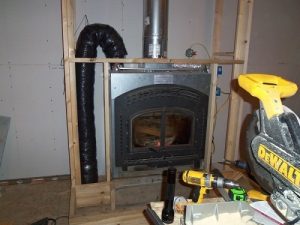
 The HRV unit becomes rid of this surplus heat. The air-conditioning unit in your home doesn’t need to work as tough to cool the attic. Even if you call in an expert to install the system for you, it takes just a brief while, hence not too costly with regard to labour charges. Or you may buy a basement ventilation system. You need to make certain you pick a system with a moisture control feature since it’s not simply enough to supply the subfloor with fresh air whilst getting rid of the stale air. This sort of installation does not involve making any adjustments to your residence.
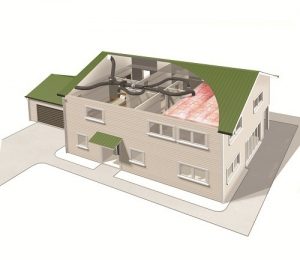
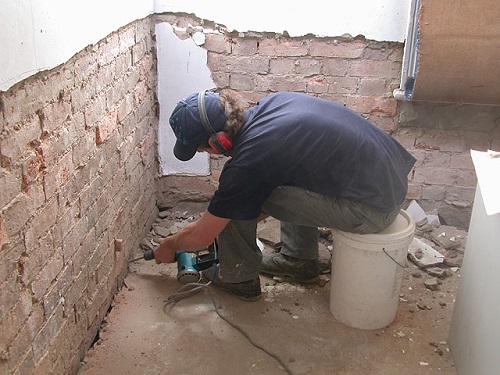
 Must smelling areas of your house, may signify you’ve an issue with residential mold. It’s the procedure for dust particles being deposited on the wall as a result of formation of a minimal temperature zone. Moreover, on occasion a ventilation system ought to be further increased as a way to guarantee delivery, exhaust balance. Properly maintained equipment won’t generate unhealthy heights of pollutants. You should talk an expert basement company for assistance.
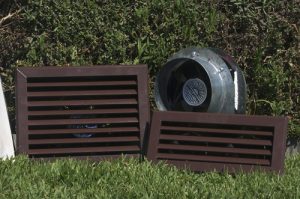
 Interior design for couples can place you (the designer) into a little hot seat in the battle of the sexes. Here are several recommendations on how you can prevent disaster. To begin with, always communicate with and listen to what both parties included envision as being their dream space. Many times one party or the other will be much more dominate in the preparation and conversations then the other. Take note of this and pay special attention to the quiet party by asking the questions and making sure to offer them the opportunity to state themselves. In this aspect of interior design for couples, you might be the mediator. Consider both sides into careful thought before doing any preparation.
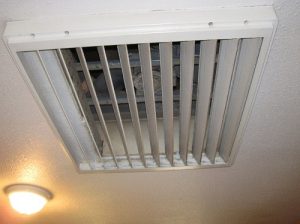
 Consider the costs related to installation and after that maintaining any system which you select. With a ventilator allows you the benefits of the full ventilation system without any extra installation. A central heating system is normally portion of a larger HVAC system. You’ll find many great reasons to improve your home’s central heating system. Read this blog for more tips and ideas on